Setting up barcode billing in a supermarket is not just about buying a scanner and printing labels. When your store has hundreds or thousands of SKUs across groceries, packaged foods, personal care, dairy, household items, and loose products, even a small setup mistake can create wrong bills, stock mismatches, and slow checkout counters.
This barcode billing setup checklist for supermarkets with large SKU lists will help you prepare your item master, barcode labels, GST rates, weighing items, staff access, and billing counters before you fully move to supermarket billing software.
Summary
For supermarkets with large SKU lists, barcode billing works well only when the product master, barcode mapping, GST rates, units, pricing, labels, scanner setup, inventory flow, and staff access are planned properly. This blog gives supermarket owners a practical setup guide to avoid wrong billing, duplicate SKUs, stock mismatches, slow checkout counters, and confusion around loose or repacked items.
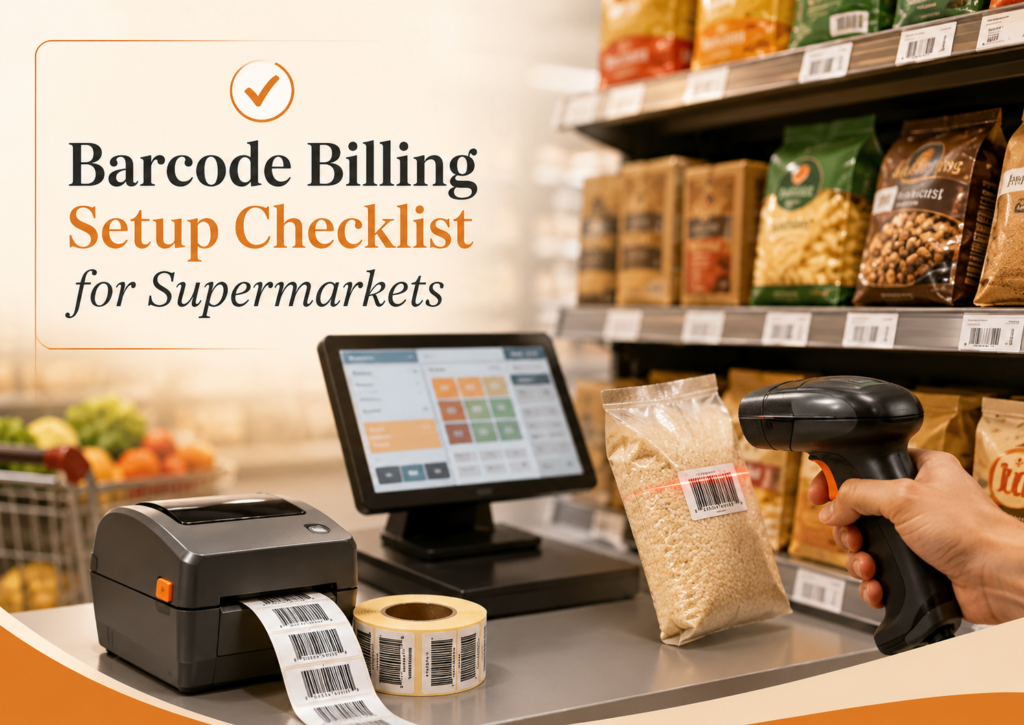
Table of Contents
- Why Supermarkets Need a Barcode Billing Setup Checklist
- Clean Your SKU List Before Barcode Setup
- Decide Which Barcodes to Use
- Map Price, GST, HSN, and Units Correctly
- Plan Barcode Labels for Loose and Repacked Items
- Choose the Right Scanner and Printer Setup
- Connect Barcode Billing with Inventory
- Handle Weighing Scale Items Separately
- Set Staff Access and Billing Counter Rules
- Test the Full Billing Flow Before Going Live
- Train Staff with Simple SOPs
- Final Barcode Billing Setup Checklist for Supermarkets
- Final Thoughts
Why Supermarkets Need a Barcode Billing Setup Checklist
Supermarkets usually deal with a high variety of items and fast billing pressure. A cashier cannot remember the price, GST rate, unit, discount, and stock details of every product. Barcode billing solves this by instantly pulling the correct item details when the barcode is scanned.
But barcode billing works well only when the backend data is clean. If one product has two names, old prices are not updated, GST rates are mapped incorrectly, or loose items are not handled properly, the scanner will only make the mistake faster.
A checklist helps you set the system correctly before using it at the billing counter.
For example, a supermarket may sell three pack sizes of the same atta brand: 1 kg, 5 kg, and 10 kg. Each pack should have a separate SKU, barcode, selling price, purchase price, GST rate, and stock quantity. If these are mixed, both the bill and the stock report will become unreliable.
Clean Your SKU List Before Barcode Setup
The first step is to clean your product list. This is more important than selecting the scanner or printer.
Create one item record for every sellable product
Each product that is sold separately should have its own item record. Do not keep one common item called “soap” or “rice packet” if you sell multiple brands, pack sizes, or variants.
A good item name should include:
- Brand name
- Product name
- Pack size
- Unit
- Variant, if applicable
For example:
- Aashirvaad Atta 5 kg
- Surf Excel Matic Liquid 1 L
- Maggi Masala Noodles 70 g
- Amul Butter 500 g
This makes billing, searching, stock checking, and purchase entry easier for your staff.
Remove duplicate and inactive items
Large supermarkets often create duplicate items over time. One cashier may create “Parle G 250g”, another may create “Parle-G 250 gm”, and a third may create “Parle Biscuit 250g”. This creates wrong stock reports because sales are split across multiple item names.
Before barcode billing starts, merge duplicates and mark discontinued items as inactive. Keep the active item list clean so the cashier does not choose the wrong product during search.
Separate similar products carefully
Similar products should not be clubbed together if they have different prices, GST rates, or purchase costs.
For example, do not use one SKU for all shampoo bottles if you sell different pack sizes. Do not use one SKU for all rice varieties if basmati, sona masoori, and loose rice are purchased and sold differently.
Decide Which Barcodes to Use
Supermarkets usually deal with two types of barcodes: manufacturer barcodes and store-generated barcodes.
Use manufacturer barcodes where available
Most packaged FMCG products already come with printed barcodes. You can map these barcodes directly to the item in your billing software. This avoids extra label printing and speeds up stock entry.
Use this for items like biscuits, packaged snacks, soaps, shampoos, packaged pulses, branded food items, and household products.
Generate your own barcodes for items without barcodes
Some items may not have usable barcodes. These include loose items, local supplier products, repacked goods, in-house packed items, or products where the barcode is damaged or inconsistent.
For such items, generate internal barcodes and print labels. Examples include:
- Store-packed dry fruits
- Loose pulses packed in 500 g or 1 kg packets
- Local bakery items
- Repacked spices
- House-brand grocery packets
If you plan to sell products through external marketplaces or formal retail channels, check whether a standard barcode registration is required. For internal supermarket billing, store-generated barcodes are usually enough for day-to-day POS use.
Map Price, GST, HSN, and Units Correctly
Barcode billing should not only identify the item. It should also pull the correct selling price, GST rate, unit, and stock details.
Add GST and HSN details item-wise
Different supermarket items may fall under different GST rates. Packaged food, household cleaners, personal care items, and dairy products may not follow the same tax treatment.
Map GST rates and HSN codes carefully at the item level. This helps generate GST-ready bills and makes it easier to share clean data with your CA during filing.
Check MRP, selling price, and purchase price
For every SKU, maintain:
- MRP
- Selling price
- Purchase price
- Wholesale or special price, if used
- Discount rules, if applicable
This is especially important when the same item has old and new stock with different MRPs. Decide whether your supermarket will bill based on the current selling price, batch-wise MRP, or separate SKU entries for old and new MRP stock.
Define units properly
Use clear units such as piece, pack, kg, gram, litre, ml, box, or carton. Wrong units create confusion during purchase entry and billing.
For example, if oil is purchased in cartons but sold as individual 1-litre pouches, the stock conversion should be handled properly. Otherwise, your purchase quantity and sales quantity will never match.
Plan Barcode Labels for Loose and Repacked Items
Supermarkets often sell products that are not scanned directly from the manufacturer’s packaging. These need a clear label process.
Decide label size and information
A barcode label should be readable and practical. It does not need too much information, but it should include what the billing staff and the customer need.
A useful label can include:
- Product name
- Barcode
- Pack weight or quantity
- MRP or selling price
- Packed date, if applicable
- Expiry or best-before date, if applicable
For items with expiry or batch tracking, make sure this information is recorded in the system and not only printed on the label.
Create a packing counter process
If your store packs loose items in advance, set a process for label printing. The staff should select the correct item, weight, price, and batch before printing the barcode.
Example: If you pack 500 g and 1 kg packets of almonds, both should have separate barcode labels or clear quantity handling in the system. This prevents a 500 g packet from being billed as 1 kg during rush hours.
Test label scanning before bulk printing
Before printing hundreds of labels, test the barcode with your scanner. Check whether the label scans correctly from different angles and under normal billing counter lighting.
Also, check the label quality after sticking it on curved, cold, plastic, or glossy packaging. Poor label placement can slow down checkout even if the barcode itself is correct.
Choose the Right Scanner and Printer Setup
Hardware should match your supermarket’s billing volume and product type.
Barcode scanner checklist
Choose scanners that are easy for cashiers to use during peak hours. Before buying, check:
- Does it support the barcode formats used on your products?
- Does it scan slightly damaged or small labels?
- Is it comfortable for long billing hours?
- Does it work well with your POS system?
- Do you need wired scanners, wireless scanners, or both?
For busy counters, a fixed or hands-free scanner may be useful for fast-moving packaged items. For bulky products, a handheld scanner is easier.
Barcode printer checklist
If you generate labels in-store, choose a barcode printer that can handle your label volume. Check:
- Label size support
- Print clarity
- Sticker roll availability
- Cost of labels and ribbons
- Ease of reprinting damaged labels
- Compatibility with your billing software
Do not select hardware only based on price. If labels fade, tear, or do not scan properly, your billing counter will slow down every day.
Connect Barcode Billing with Inventory
Barcode billing should update stock automatically. Otherwise, you will only speed up invoice creation while still struggling with stock mismatches.
Update stock when sales happen
Every scanned sale should reduce stock from the correct SKU. This helps you know which items are selling fast and which items are lying unsold.
This is useful for supermarket categories such as snacks, dairy, cleaning products, personal care, staples, and beverages, where demand changes quickly.
Record purchases against the same SKU
Purchase entries should use the same item records used during billing. If purchases are entered under one item name and sales happen under another, your stock report will become inaccurate.
For large SKU lists, bulk import through Excel can save time during setup. But after import, review key fields like item name, unit, GST rate, opening stock, MRP, and barcode before billing starts.
Set reorder levels for fast-moving items
Barcode billing gives useful sales movement data only when the inventory is connected. Set reorder levels for fast-moving items so your team can act before stock runs out.
For example, if milk packets, bread, packaged snacks, or cooking oil sell daily, low-stock alerts can help you place orders before customers start asking for unavailable items.
Handle Weighing Scale Items Separately
Many supermarkets sell loose items by weight. These need a different setup from packaged products.
Identify weight-based SKUs
Create a separate list for items sold by weight, such as:
- Loose rice
- Pulses
- Dry fruits
- Fruits and vegetables
- Sweets or snacks sold by weight
- Store-packed grains
Decide whether these will be weighed at the counter, pre-packed with labels, or billed through a weighing scale integration.
Avoid manual price typing for weighted items
Manual price typing creates billing errors and makes it difficult to track inventory. Wherever possible, use item selection with quantity or weight entry, or printed barcode labels for pre-packed items.
If your supermarket uses weighing labels, test whether the barcode format is read correctly by your POS system before using it for customer billing.
Set Staff Access and Billing Counter Rules
Barcode billing involves multiple staff members: purchase entry staff, stock managers, cashiers, supervisors, and owners. Everyone should not have the same access.
Define user roles clearly
For supermarkets, useful access rules may include:
- Cashiers can create bills but cannot change item prices freely
- Supervisors can approve discounts and returns
- Inventory staff can update stock and purchase entries
- Owners can view reports and change settings
This reduces accidental changes and protects important business data.
Keep price edits controlled
Cashiers should not manually edit prices during billing unless there is a clear approval process. If price changes are common, maintain proper price lists, discount rules, or supervisor approval instead of depending on memory.
Track returns and bill cancellations
Returns, exchanges, and cancelled bills should be recorded properly. This helps match stock, cash, UPI collections, and day-end reports.
For example, if a customer returns a scanned shampoo bottle, the system should update both the sale return and the stock quantity correctly.
Test the Full Billing Flow Before Going Live
Never launch barcode billing directly during peak business hours. Test it with real supermarket scenarios first.
Run sample bills for different item types
Create test bills for:
- Packaged products with manufacturer barcodes
- Store-labelled products
- Loose or weight-based items
- Discounted items
- Multiple quantity items
- Returned items
- GST and non-GST items, if applicable
- Cash, UPI, and card payments
Check whether the invoice, stock update, tax calculation, and payment record are correct.
Test rush-hour scenarios
Ask your cashiers to scan a mixed basket quickly. Include small items, large items, similar-looking SKUs, and products with damaged labels.
This helps you identify issues before customers face them at the counter.
Keep a correction log for the first few days
During the first week, maintain a simple correction log. Note issues such as missing barcodes, wrong item names, price mismatch, duplicate SKUs, unreadable labels, and scanner errors.
Fix these daily. Barcode billing becomes smoother when your team treats setup as a process, not a one-time activity.
Train Staff with Simple SOPs
Even the best barcode setup can fail if staff are not trained properly.
Create cashier SOPs
Cashiers should know:
- How to scan products
- What to do if barcode is not found
- How to search items manually
- How to bill multiple quantities
- How to handle returns
- When to call a supervisor
Keep the SOP short and practical. A cashier should not need to read a long manual during billing hours.
Train stock and purchase staff separately
Purchase and stock teams should know how to add new items, map barcodes, update purchase stock, print labels, and correct item details.
Do not allow random item creation without a process. For large SKU lists, uncontrolled item creation is one of the fastest ways to damage inventory accuracy.
Review reports with the owner or manager
The owner or store manager should regularly review item-wise sales, low-stock items, stock mismatch reports, and top-selling categories. Barcode billing is most useful when it improves decisions, not just billing speed.
Final Barcode Billing Setup Checklist for Supermarkets
Before you go live, use this quick checklist:
- Clean duplicate and inactive SKUs
- Create separate item records for each brand, size, and variant
- Map manufacturer barcodes, where available
- Generate internal barcodes for loose, local, or repacked items
- Add GST rate, HSN code, unit, MRP, selling price, and purchase price
- Test barcode labels before bulk printing
- Choose scanners and printers suitable for the daily billing volume
- Connect billing with inventory updates
- Set reorder levels for fast-moving items
- Create separate handling for weighing scale items
- Define cashier, supervisor, inventory, and owner access
- Test billing, returns, discounts, and payment modes
- Train staff with simple SOPs
- Review errors daily during the first week
Final Thoughts
Barcode billing can make supermarket checkout faster and more accurate, but only when the setup is done carefully. For stores with large SKU lists, the real work is in cleaning item data, mapping barcodes correctly, setting GST and price details, handling loose items, and training staff.
A good barcode billing setup should help your supermarket reduce billing mistakes, maintain better stock control, and make day-end reporting easier.
